Locate Your Site Photos on the Plan: 2026 Method
The day you hunt for one specific photo in 800 shots
A site visit produces 40 to 80 photos. Over a project that runs a year, your camera roll holds several thousand. Then comes the moment you need just one of them: the crack spotted in the basement, the electrical rough-in before the wall went up, the defect you flagged to the contractor three weeks ago. You scroll through hundreds of near-identical shots with nothing to tell you where each was taken. The photo exists. It has become impossible to find, because nothing ties it to a place in the building.
The problem comes from how the photos are filed, not from the camera. Photo pinning on the plan ties each image to a precise point on the plan instead of a plain date. The method below works from your phone, during the visit, on a construction site as much as on a property inspection, an expert survey or a building-portfolio review.
The problem with “loose” site photos
By default, site photos pile up in your phone’s camera roll, sorted by time. They are handy in the moment and useless three weeks later. A photo of a wall could match any of the project’s forty walls. Nothing in the image says which floor, which room, or which element it shows.
A chronological folder fails on four counts. It gives no spatial context: a photo’s date doesn’t say where it was taken. It makes searching painful: finding one shot among hundreds means remembering the exact day of the visit. It weakens the report: an observation without a location forces the reader to guess where you mean. And it undermines your position in a dispute: a photo that doesn’t locate the defect proves little.
Storage costs next to nothing. What costs is the time lost re-finding an image, and the credibility you lose when you can’t pinpoint a problem in front of a client or a contractor. A photo you can’t place on a plan ends up serving no one. For more on this, see our article on how to centralize your site monitoring to avoid losing information.
What is photo pinning on a plan?
Photo pinning means tying each photo to a precise point on the plan. Instead of sorting images by date, you attach them to the spot in the building where they were taken. The plan becomes a map of your visit: each point you drop links to a photo, and you move from photo to plan and back.
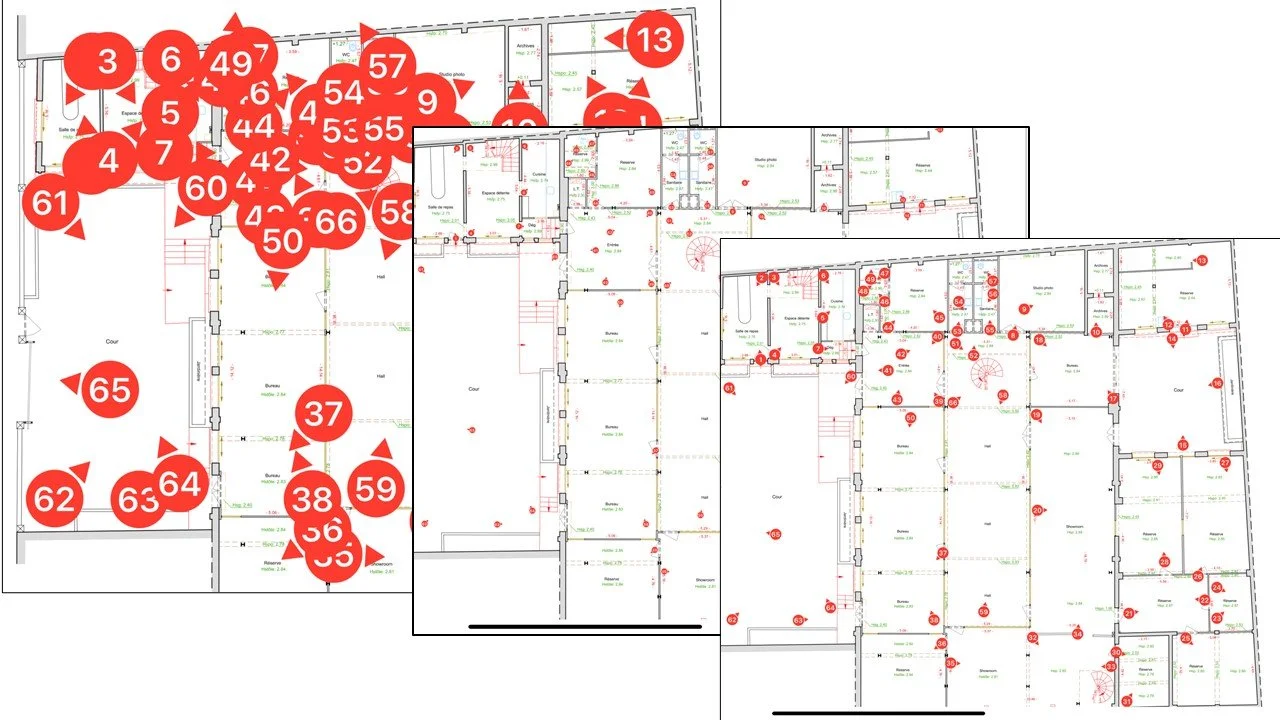
The practice has existed on paper for a long time. The project lead printed the plan, placed numbered markers (P-01, P-02, and so on) at the photographed spots, then carried the same numbers onto the prints or into the observations table. That annotated plan has a name in the trade: the markup plan, or photo-location plan. It turns a string of photos into a file anyone can read, because you can start from the plan to find the image, and from the image to get back to the plan.
The digital version automates that link. You tap the plan where you took the shot, and the photo is pinned there with a numbered point. The number follows the point, the photo stays attached, and the plan fills up as the visit goes, with no manual entry. It is the same principle as the paper marker, without the copying work or the risk of numbers drifting out of sync. The image at the top of this article shows the result: numbered points dropped on the plan, each tied to a photo, an annotation and an audio note.
Manual or digital pinning: what changes
Manual pinning works, and many professionals still do it in pencil on a printed plan. It hits its limits as soon as volume climbs: several floors, dozens of photos per visit, observations that appear and disappear from one week to the next.
| Criterion | Manual pinning (paper, Word, Excel) | Digital pinning on the plan |
|---|---|---|
| Dropping the marker | Marker drawn, then copied by hand | One tap on the plan, at the spot |
| Numbering | Manual, redone if a photo is deleted | Automatic and tied to the point |
| Risk of error | High: photo and number drift apart | Low: the photo stays attached to its point |
| Finding a photo | By date, scrolling | By the plan, opening the point |
| Several floors | One paper plan per floor to juggle | Switch from one plan to another in the project |
| Sharing | Scanned plan plus a separate photo folder | Annotated plan and photos in a single report |
| Photo quality | Compressed when inserted into Word | Kept in HD |
| Formatting time | 1 to 2 hours at the office afterwards | A few minutes, finished on site |
Dropping the markers is quick. The upkeep is not: renumbering when an observation is deleted, re-matching a photo to its number when the order changes, redoing the markup on every update. On a site with thirty observations per visit, this upkeep is the step you skip when the deadline bites, and the markup plan loses its reliability.
The 5-step pinning method
The method runs in five steps, from your phone, during the visit. A pinning app speeds them up; the principle depends on no particular tool.
1. Import the plan. Prepare one plan per zone or floor, legible and current, as a single-page PDF. An architect’s plan, a construction drawing, a sketch or even a screenshot will do, as long as you can read it. Several clear plans beat one overloaded plan.
2. Follow a logical route. Don’t zigzag through the building. Move room by room or zone by zone, in an order you can repeat on the next visit. The plan fills up coherently, and comparing one visit to the next becomes immediate.
3. Drop each photo at the point of capture. As you shoot, tap the plan where you stand or where the subject is. Do it on the spot, while your spatial memory is fresh. Putting this step off to the office kills it: once you sit down, half the points turn ambiguous.
4. Annotate and comment in the moment. An arrow or a circle on the photo, a one-line caption, or an audio note of a few seconds. “Tile lippage at the threshold, third tile from the left, contractor notified today” says more than a polished caption written three days later from memory.
5. Export the marked-up plan and the gallery. At the end of the visit, the plan carrying the numbered points and the located photos form your report together. A PDF or HTML export brings them into one document the client opens without installing anything.
This method changes what the file is: you no longer come back with a pile of photos to sort, but with a plan already filled in. The filing work, which used to happen at the office, is done before you leave the site. That is also one of the big wins of the construction site report on a smartphone: a single device to shoot, pin, annotate and export.
Preparing your markup plan
Good pinning starts with a good plan. A few simple rules avoid most problems. Choose a legible, current plan: an out-of-date construction drawing makes you drop points in the wrong place. Prefer one plan per floor or zone over a single dense plan where the points end up overlapping. Keep a consistent scale and orientation from one visit to the next, so you can compare the same points over time. And name each plan without ambiguity (“Building B, Level 2”) so you never hesitate when dropping a photo.
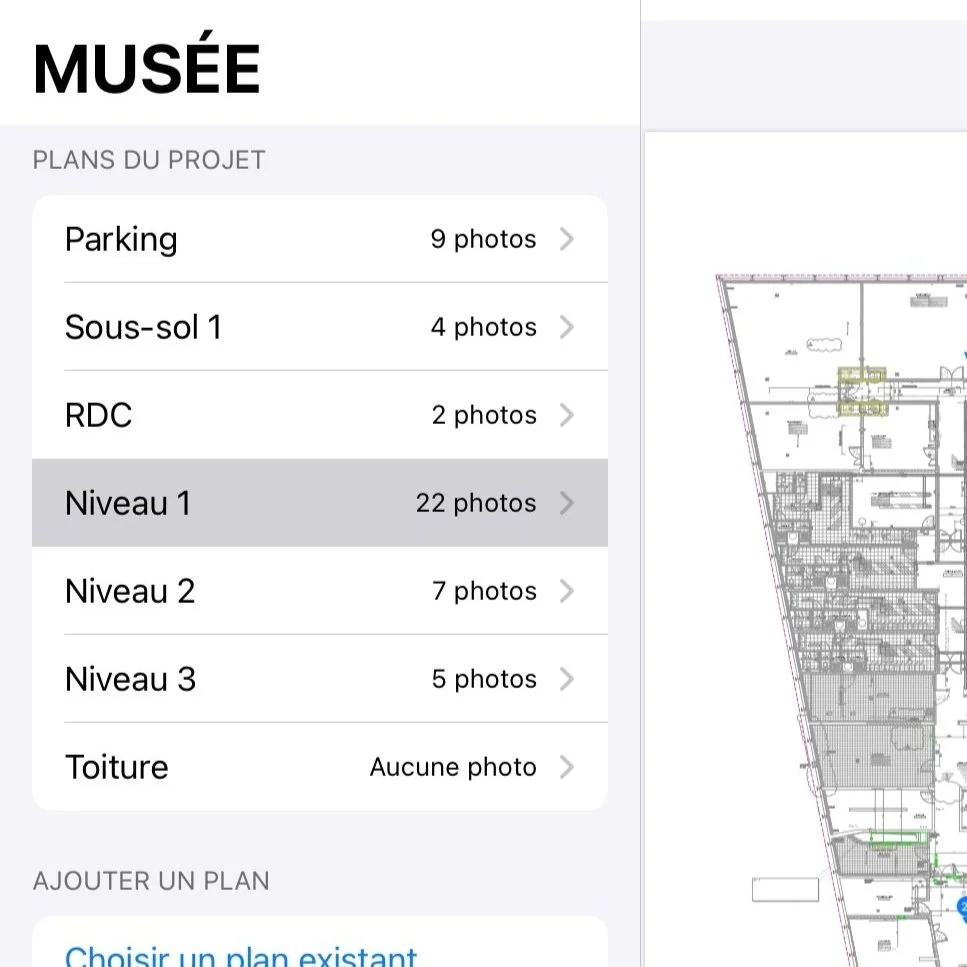
PhotoReport is built around this workflow. You import your plan as a single-page PDF, and visit mode pins each photo on the plan at the point you tap, one after another, without breaking your route. The photo is kept in full quality (HD), the annotation and audio comment stay attached to the same point, and you move from one plan to another (floors, zones, buildings) without leaving the project. You build the markup plan as the visit goes, with nothing to re-file at the office.
Putting located photos to work
The payoff comes after the visit.
A report you read at a glance. The marked-up plan up front, each photo tied to its point: the reader sees the what and the where at once. That is what separates a usable construction photo report from a plain image gallery.
A photo found in two seconds. Weeks later, you no longer have to remember the date. You open the plan, tap the point, and the photo and its context (annotation, audio) come back with it.
Spatial context that holds up in a dispute. A located, dated and geotagged photo pinpoints the defect without ambiguity. It doesn’t replace a notarized report or a certified timestamp when probative value has to be maximal, but it removes the most common argument on a site, the one that is not about what was seen but about where. On work covered by defects liability or a long-term structural warranty, that spatial marker often makes the difference.
Clear handover to everyone involved. The markup plan tells each trade where to step in, and shows the client what you mean without a trip to site, all from one plan.
Beyond the site: surveys, inspections, portfolios
Photo pinning on a plan isn’t only for tracking works. Any activity that documents a place in photos gains from dropping them on a plan rather than stacking them by date.
In an expert survey, a defects report becomes readable when each crack, leak or fault is pointed out on the building’s plan. For a premises or site visit report, photos dropped on the home’s plan, room by room, make a far clearer record than a separate image folder. In property management and maintenance, pinning interventions on a building’s plan lets you track its condition over time and find, years later, what was done and where. And in fit-out or furniture work, the layout plan serves directly as the pinning base. In every case the principle holds: a plan, some points, and each photo in its place.
FAQ
What kind of plan should I use for photo pinning?
Any legible, current plan: an architect’s plan, a construction drawing, a dimensioned sketch, a surveyor’s plan or a simple screenshot. What matters is being able to read it. Favor one plan per floor or zone, as a single-page PDF, rather than one overloaded plan where the points overlap.
Do I have to number photos by hand?
On a paper plan, in Word or Excel, yes, and you renumber everything each time a photo is deleted or added. With a pinning app, the number follows the point dropped on the plan: the photo and its marker stay linked, however many changes you make.
Can I pin photos across several floors?
Yes. Best practice is one plan per floor or zone, then switching between them depending on where you’re shooting. That avoids the confusion of a single plan for the whole building and keeps each level readable.
How do I find one specific photo weeks later?
By the plan, not the date. You open the markup plan, tap the point, and the photo comes back with its annotation and any audio comment. You no longer need to recall the day of the visit or scroll through hundreds of shots.
Is a located photo worth more in a dispute?
It pinpoints the defect without ambiguity, which settles the most common argument, the one about where. Paired with the date and geolocation, it makes a solid piece of file. For stronger probative value, a notarized report or a certified timestamp from a trusted third party remains the reference, but a file of located, dated photos makes your position much harder to contest.
Try PhotoReport on your next visit
If pinning on the plan makes sense but you still do it by hand, the gain is speed: drop the photo on the plan in one move, during the visit, instead of re-sorting everything at the office. PhotoReport is built around this workflow on iOS, with photos pinned on plans, annotations, audio comments and one-tap PDF or HTML export.